Introduction
A support portal allows you to communicate more quickly and easily with your customer about an outstanding support issue. The portal offers your customer direct insight into the status of the support ticket and allows you to make the support process more efficient. Tribe CRM offers a number of standard portals that you can start using right away. In this article, we will explain the functions of the support portal.
Also, for more information on the benefits of portals, we recommend you read through this article.
- What is the support portal?
- How can you activate the support portal?
- How can you invite contacts to the support portal?
- How can you remove contacts from the support portal?
- What does the support portal look like?
- Do portal users see all notes and attachments?
1 What is the support portal?
With the support portal, you give your customer the ability to view and edit support tickets online. Customers get their own login details and can view support tickets, add notes and attachments and create new support tickets.
2 How can you activate the support portal?
You want to get started with the support portal, but you can’t find it? To use the support portal, the Ticketing module will need to be activated. Activating this module will allow you to use the Support module, the Support Portal and Ticketing.
In the account settings, Tribe CRM administrators can activate the Ticketing module.
- Click on the organisation icon at the top right of the blue bar.
- Click Account settings.
- Click the add/remove modules
- Tick the Module Ticketing option and click Get started.
In Configuration > Portals, you can see whether the Support portal is available:
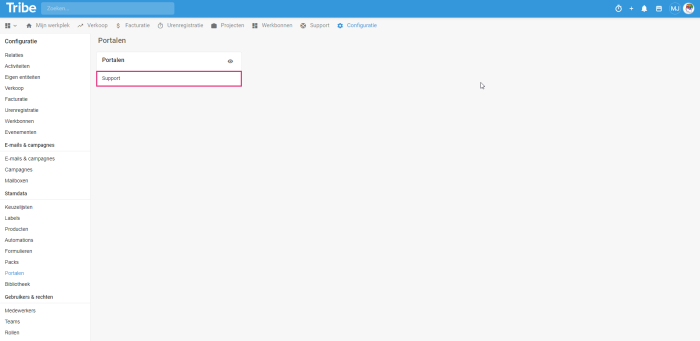
The support portal activated in Tribe CRM
3 How can you invite contacts to the support portal?
The moment the support module is activated, you have the option of inviting contacts to the Portal. This can only be done by Tribe CRM administrators. To do this, open the relation card of the person you want to invite:
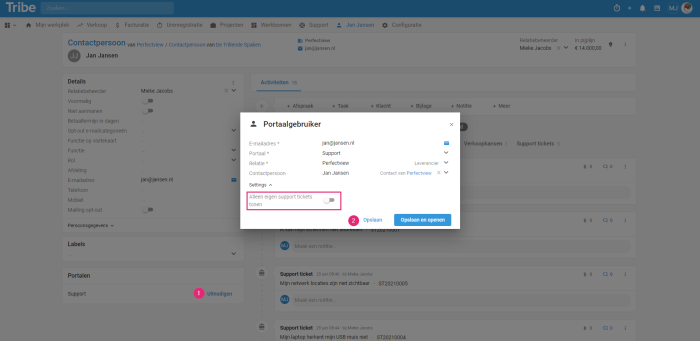
- Click on the Invite button in Portals
- Complete the details and click Save. Slide Show only own support tickets to the right if the contact should only see their own support tickets.

Invite a contact to the support portal in Tribe CRM - The customer then receives an email invitation:

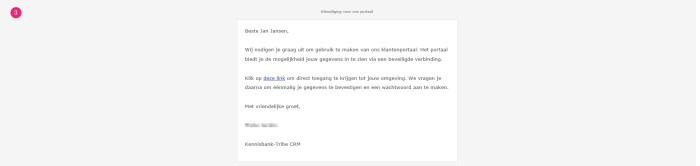
Invitation to the support portal in Tribe CRM - Clicking on this link in the email opens and website with the following message:

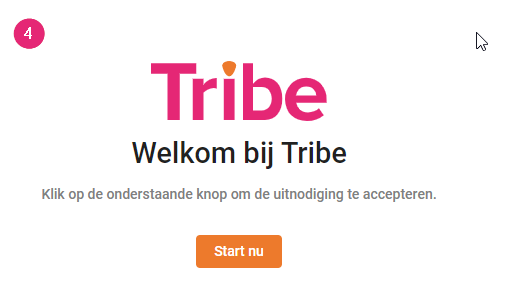
Welcome to Tribe CRM - Once the customer clicks Start Now, login details can be created and the customer can log in. The URL where the customer can log in is https://app.tribecrm.nl/
 .
.
 .
.4 How to remove contacts from the support portal?
Open the relation card of a contact you want to remove from the support portal and click on Manage under Portals. You then have the option to remove the relation from the portal and to change the Show only own support tickets setting. This can only be done by Tribe CRM administrators.

Delete contact from the support Portal in Tribe CRM
5 What does the support portal look like?
The support portal in Tribe CRM consists of three different pages of information. The portal user (your customer) can not only find information, but can also add data.
The overall picture:
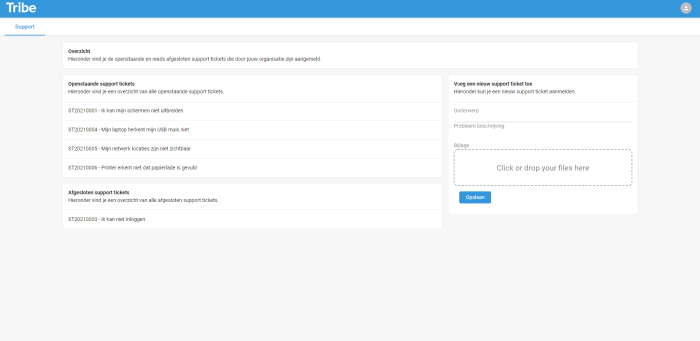
The support portal in Tribe CRM
- All support tickets linked to this organisation are shown here, regardless of which contact it is linked to. In case the setting Show only own support tickets for this contact is on, only the support tickets linked to this relation will be shown. You can easily click through to see detailed information of a support ticket.
- In addition, the portal user has the option to submit a new ticket. Here it is also possible to add an attachment.
The support ticket:
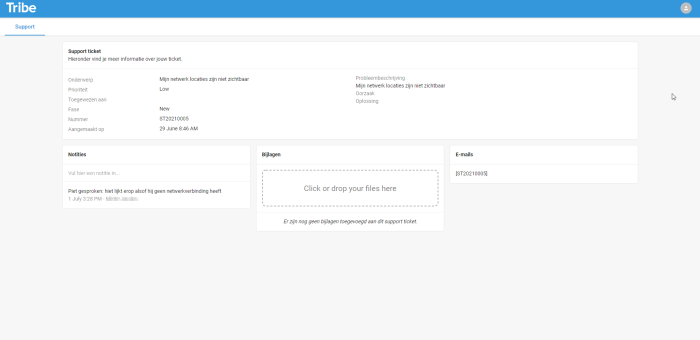
The support ticket in the support portal in Tribe CRM
- Clicking on a ticket in the overview displays the ticket’s detailed information. Such as e.g. the ticket number, the description of the problem and the current status.
- All notes from the ticket are displayed and the portal user has the option to add a new note.
- The attachments to the ticket are displayed. The portal user has the option to download an attachment or upload an additional attachment.
- Furthermore, you will see an overview of all emails related to the support ticket. By clicking on an e-mail, the content of the e-mail is displayed.
- You return to the overall overview by clicking Support in the top left corner.
E-mail:
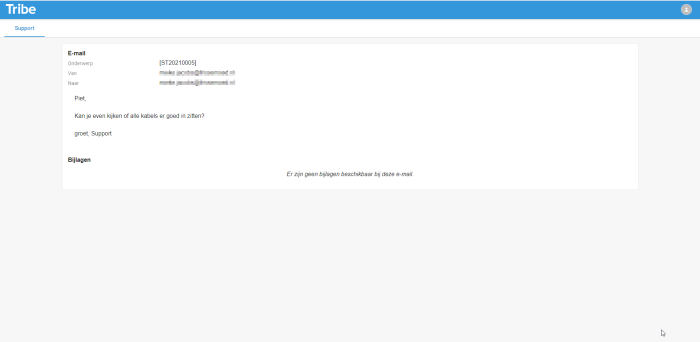
An email in the support portal in Tribe CRM
- Clicking on an e-mail displays the content of the e-mail, possibly with attachments. These can be downloaded by the user.
- You return to the overall overview by clicking Support.
6 Do portal users see all notes and attachments?
Basically, your customer sees all the details of the support ticket, such as the ticket number, subject, problem description, cause and solution. Notes and attachments are also visible. However, the default setting is that a note or attachment is not visible in the portal. If you do want to share certain data with the portal user, you can do so by clicking on the eye and turning on the visible in support portal slider when making a note or uploading an attachment. That way, you always keep a grip on what is shown on the portal.

Making notes visible in the support portal in Tribe CRM