Introduction
With the events module, you can easily create events, track participation and record all communication around your event. You link related documents to your event so that they are available to all employees. You update your event on your PC, smartphone or laptop. Even when you are on route. You invoice the participations directly and keep track of which participations are optional or confirmed. This article tells you more about how to work with the events module.
- How can I create events?
- The events screen.
- How can I customise and create phases?
- How can I add participations to an event?
- How do I select participants for an email campaign?
- How can I send an invoice from an event participation?
- How can I complete an event?
1 How can I create events?
Create an event linked to your own organisation, or linked to an external relation.
Creating an event from the blue bar
Click the +Button in the blue bar and choose Event:
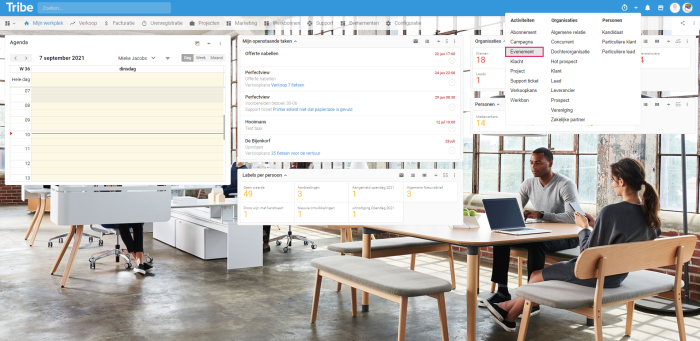
Creating an event in Tribe CRM
Creating an event from a relation
Open the relationship and click on Event.
- Open the relationship
- In the + bar, click on More and then choose Event.
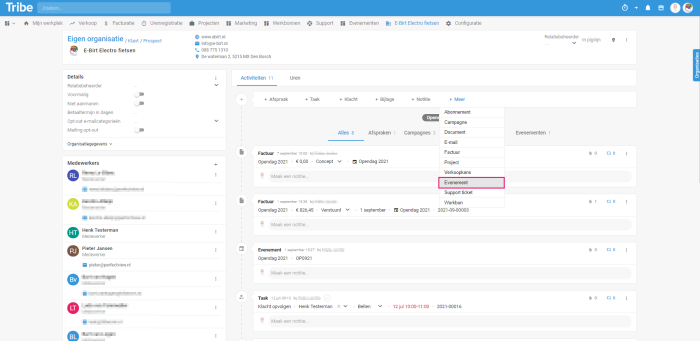
Creating an event linked to a relation in Tribe CRM
Enter the details and click Save or Save and Open if you want to continue working on the event.
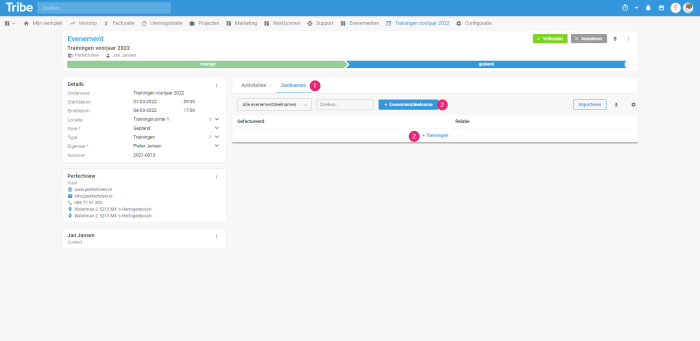
2 The Events screen
The events screen gives a complete overview of your event, open tasks and appointments, emails, documents and participations.
- Subject: Enter the subject of the event here. This topic is displayed at the top of the event and can also be searched for here.
- Start date: The start date and time can be entered here.
- End date: Enter the end date and time. Once the start and end dates are entered, the phase of the work order changes from Draft to Scheduled.
- Location: The location of the event can be selected or created here.
- Phase: Draft, scheduled, completed and cancelled: The phase of the work order is displayed on the left of the Details screen, as well as at the top of the event.
- Type: Select an event type or create a new one.
- Owner: The employee who creates the event is entered automatically. This can be modified.
- Number: Enter your own number here or let Tribe CRM create the number automatically.
- Activities: All activities around this event, finished or open, can be created here so that there is a complete overview of open tasks, appointments and of activities that have already been completed.
- Participations: Here you will find an overview of the participations.
- Complete: Complete the event here once it has been completed.
- Cancel: If the event no longer takes place, the event can be cancelled here.
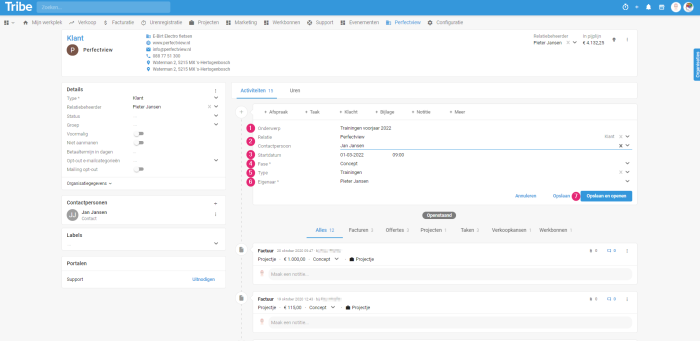
The event screen in Tribe CRM
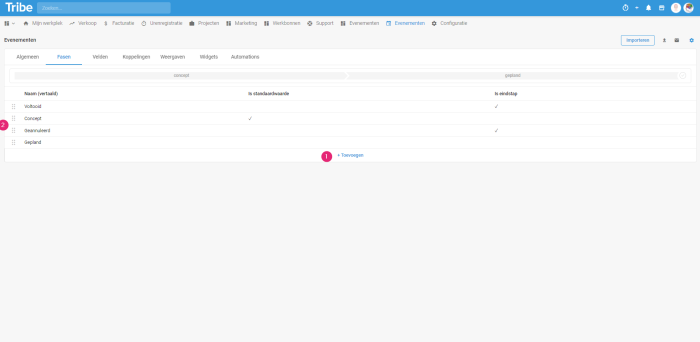
3 How can I customise and create phases?
You can manage your event by using phases. Customise the phases to suit your organisation. You can customise the phases in the configuration of activities:
- Click
- Go to
- Click on
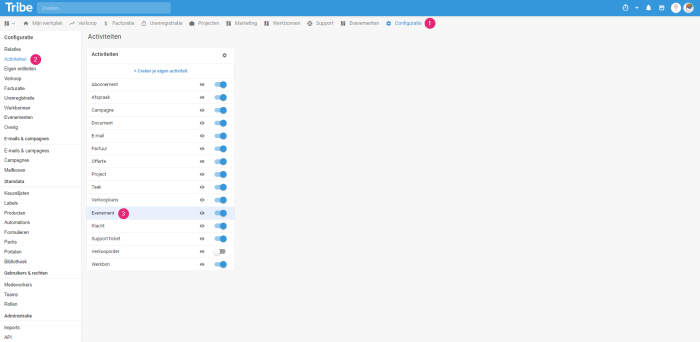
Customise event phases in Tribe CRM
- Click on the Phases tab. Click +Add if you want to add a phase. Click on an existing phase to modify it. Slide Is default value to the right if you want every event to have this phase when created.
- By clicking on the 6 dots, you can drag the phase to a different order.
Customise event phases in Tribe CRM
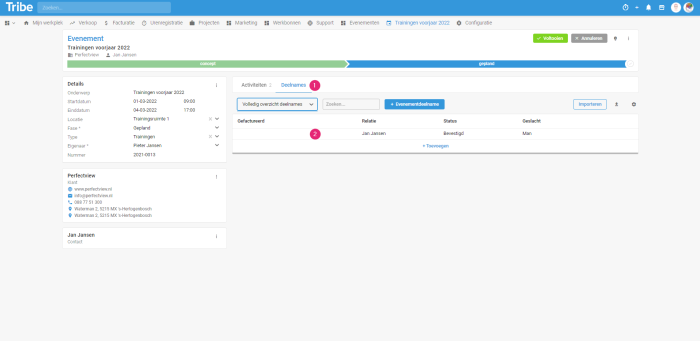
4 How can I add participations to an event?
Follow the steps below to add a participation to the event.
- Open the event and click on the Participations
- Click +Event participation or +Add.
Adding a participation to an event in Tribe CRM
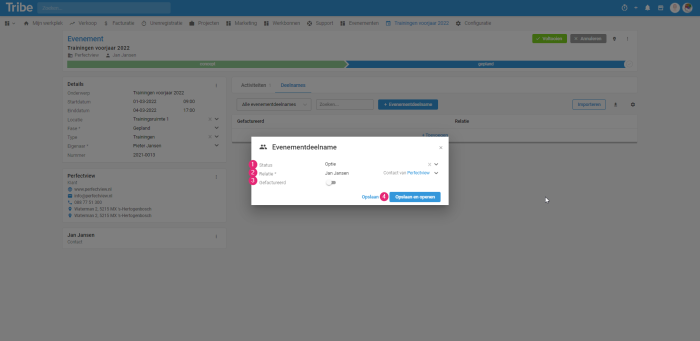
- Enter the Status of the participation or create a New event participation.
- Select the
- If the participation has already been invoiced, slide Invoiced to the right.
- Click Save or Save and Open if you want to continue working on the participation.
Adding a participation to an event in Tribe CRM
5 How do I select participants for an email campaign?
With event creation and participant registration, all event information is available in one overview. It is then also possible to reach event participants directly with an e-mail campaign at once. For example, you can send a programme for the event.
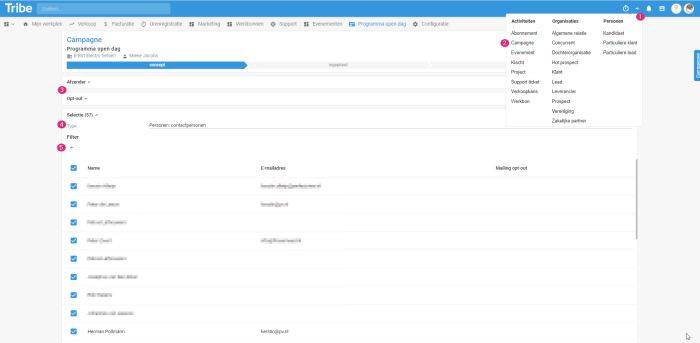
- Click the +Button in the blue bar.
- Click on Campaign.
- Enter the Sender and any Opt-out of the campaign.
- Click Selection and under type People, select Contacts.
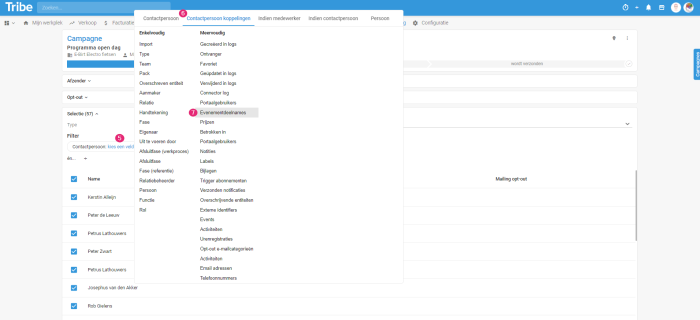
- Click the +Button next to Filter and click Comparison. Click Choose a field.

Creating a selection of event participants in an email campaign in Tribe CRM - Click on Contact links.
- Select Event participations.

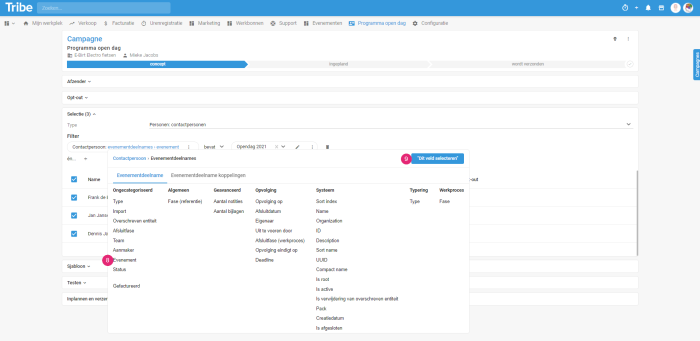
Creating a selection of event participants in an email campaign in Tribe CRM - The next screen displays the event participation fields. Choose Event.
- Click Select this field.

Creating a selection of event participants in an email campaign in Tribe CRM - Select the event that applies. The screen below will immediately show the result of the selection so you can check if the selection is correct.
Making a selection of event participants in an email campaign in Tribe CRM.
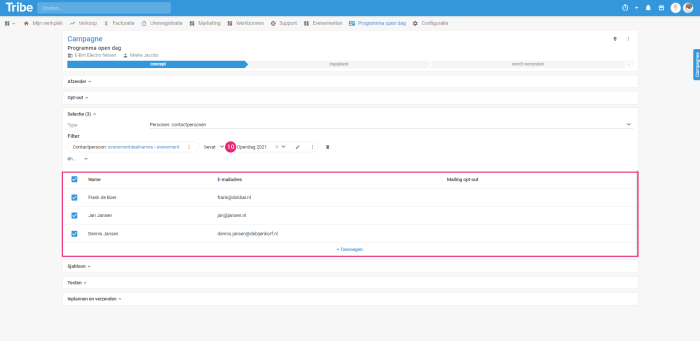
You have now selected the participants and can proceed with the campaign. The article How do I send an email campaign in Tribe CRM explains more about creating and sending email campaigns.
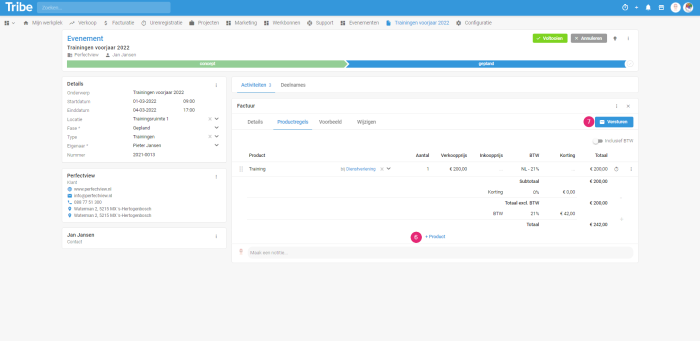
6 How can I send an invoice from an event participation?
It is possible to send an invoice directly from a participation. Contact details are transferred directly into the invoice and the invoice is immediately linked to the event for easy retrieval.
- Open the event tab Participations.
- Select the participation you want to send an invoice to. The participation will be opened.
Invoicing from an event participation in Tribe CRM
- Click +Invoice.
- Enter the details of the invoice.
- Click Save and open.

Invoicing from an event participation in Tribe CRM
- The invoice opens and product lines can be added to the invoice. Click +Product to add product lines.
- Click Submit to send the invoice to the participant.
Invoicing from an event participation in Tribe CRM
- Open the participation that has just been invoiced and slide Invoiced to the right.

Invoicing from an event participation in Tribe CRM
Did you know?
You can find more information on invoicing in the article How do I create and send an invoice?
6 How can I complete an event?
Once an event is completed, it can be completed. This ensures that it is clear to everyone that the event is closed. Open the event and click Finish.

Completing an event in Tribe CRM