Introduction
Tribe CRM ensures that you streamline the processes within your organisation. From sales , to planning, to delivery and invoicing. The work order contains all made appointments, hours and materials. Colleagues have insight into each other’s planning through synchronisation with the Outlook and Gmail calendars. The field service ensures that the work order is digitally signed by the customer directly on site. The back office then sends the invoice. This creates a flow from planning to work order to invoice.
- What does the work order module offer?
- How do I activate the work order module?
1 What does the work order module offer?
Schedule work orders in the planner and synchronise with your calendar
On the work order dashboard, you can immediately see which work orders have been scheduled and schedule new ones. These are also displayed in the calendar on My workplace and you can synchronise the calendar with your outlook calendar.
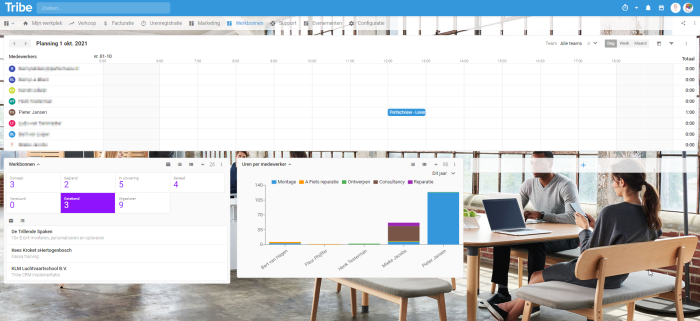
Dashboard of the work order module in Tribe CRM
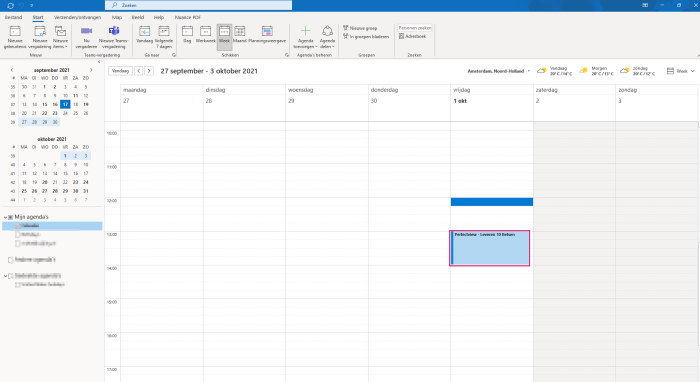
Synchronise your calendar in Tribe CRM
Creating a work order where you need it
A work order records hours worked and products delivered. After visiting a customer, this work order can be signed digitally or directly on site so that the invoice can be sent afterwards. With the work order module, you can easily create work orders from a project, a won sales opportunity or directly linked to a relation.
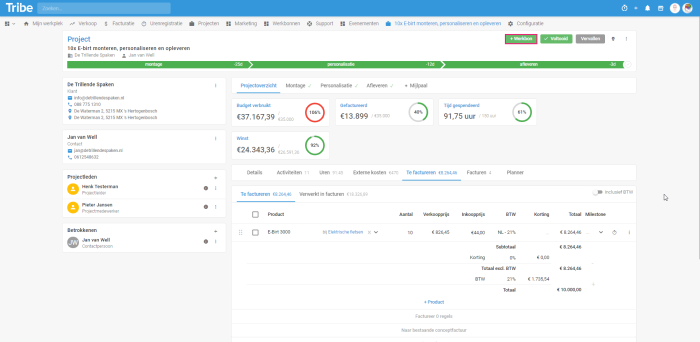
Adding a work order to a project in Tribe CRM
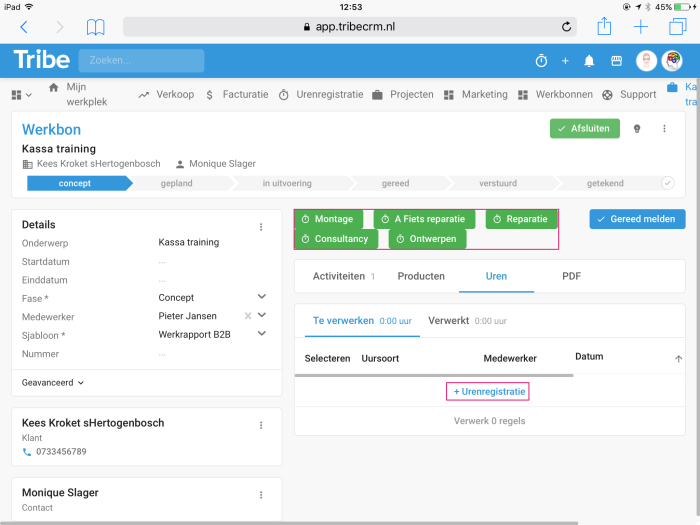
Automatic recording of hours on the work order
Once the work order is created, hours can be booked directly on this work order via your smartphone, tablet or PC. This can be done manually (1) or with the timer (2).
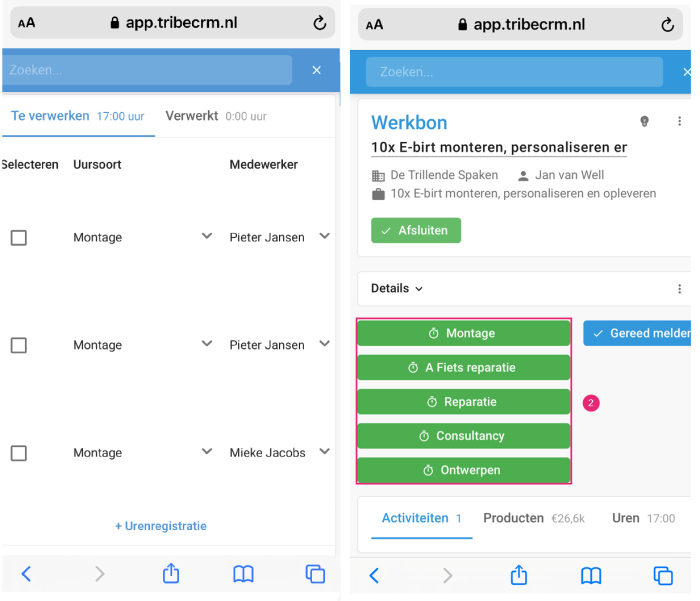
Editing a work order on your phone in Tribe CRM
Editing a work order on your tablet in Tribe CRM
Booking products on the work order
When visiting a customer where products are also to be delivered, these can be shown directly on the work order, in addition to the hours. This way, the customer sees exactly what the products to be delivered are and can be checked immediately. Fewer misunderstandings and professional service.
A work order with both products and hours in Tribe CRM
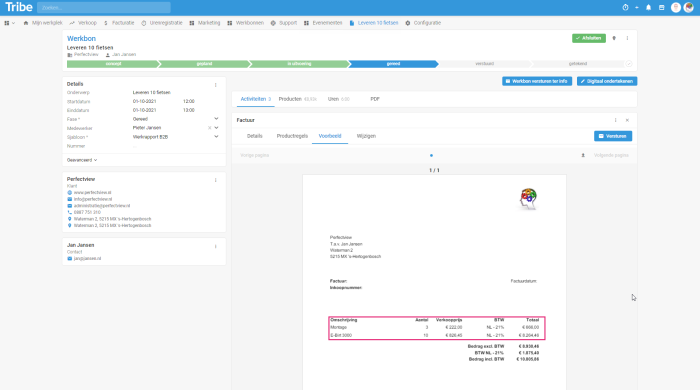
Send the work order immediately after the visit
At the end of the visit, the work order can be reported Done and sent directly to the customer. If that work order does not need to be signed, you can send a Work Order for information (1). You can also have the work order signed digitally (2) so that it can then be processed directly into an invoice (3).

Sending a work order directly in Tribe CRM
Send the work order directly by e-mail prepared in your own professional house style:

An accompanying e-mail in your own house style in Tribe CRM
The work order can also be fully customised to suit your own house style. The customer can click on the link and view and approve the work order directly in a web browser. The employee can also display the work order on the screen of a tablet and have it signed immediately:

Viewing a work order in the web browser in Tribe CRM
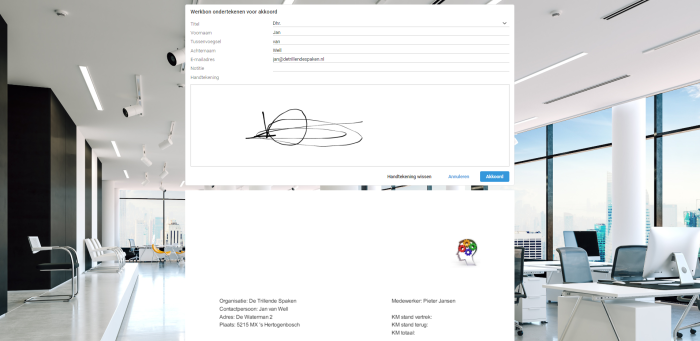
Approve a work order in the web browser in Tribe CRM
Transfer work order to an invoice
Experience even more convenience by transferring the work order directly to a professional invoice. The lines of the work order are transferred into the invoice and it can be sent directly.
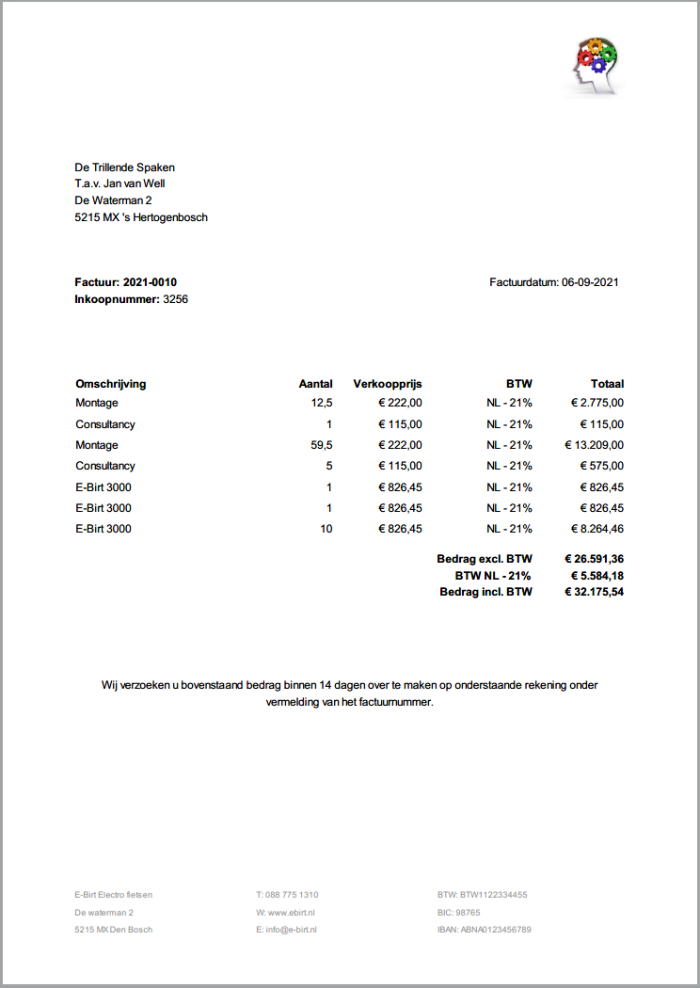
Invoice from a work order in Tribe CRM
Dashboard Work orders
On the Work Order dashboard, you can instantly see what the schedule (1) is for each employee and the hours per employee. You can expand the dashboard with your own widgets and views. This way, you keep a good overview and you can quickly click through to the work order you want to work on.
Did you know?
You can find more information on working with the work order module in the article How do I work with the work order module?
2 How do I activate the work order module?
Administrators of Tribe CRM can easily activate the Work Order module themselves. You can do this in the account settings:
- Click on the organisation icon at the top right of the blue bar.
- Click on Account settings
- Click the add/remove modules button.
- Tick the Module work orders option and click on get started.