Introduction
With the timesheet module, you can accurately track your hours of all your tasks, appointments and phone calls. Even when you are on the road. You then link them to the right project or customer with a single click. The result: overview, correct invoices and clear reports. Read more about how to register hours in this article.
- How can I register hours through the timer?
- How can I record hours afterwards?
- How can I register hours via tasks and appointments?
- How do I add hour types?
- How can I process hours?
1 How can I register hours via the timer?
Within Tribe CRM, you have a timer that allows you to turn it on during your work so you can accurately track the time you spend on certain projects, tasks or appointments.
- To do this, click on the timer in the blue bar of Tribe CRM.
- Specify which activity you want to start the time registration for, for which hour type and whether the registration is billable (hours can be invoiced).
- The timer remains visible in the blue Tribe bar. Once you are done, stop the hour registration by clicking on the alarm clock with the dash through it. The hour registration is saved automatically.
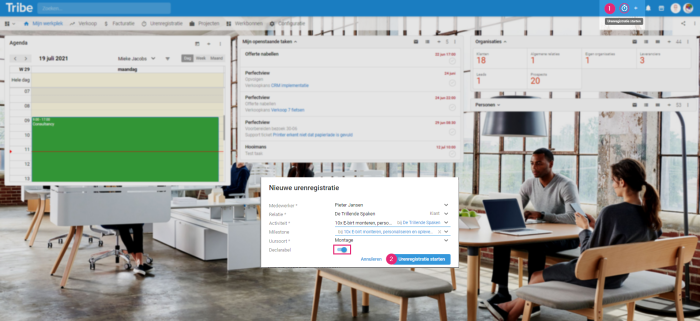
Start time tracking via timer in Tribe CRM
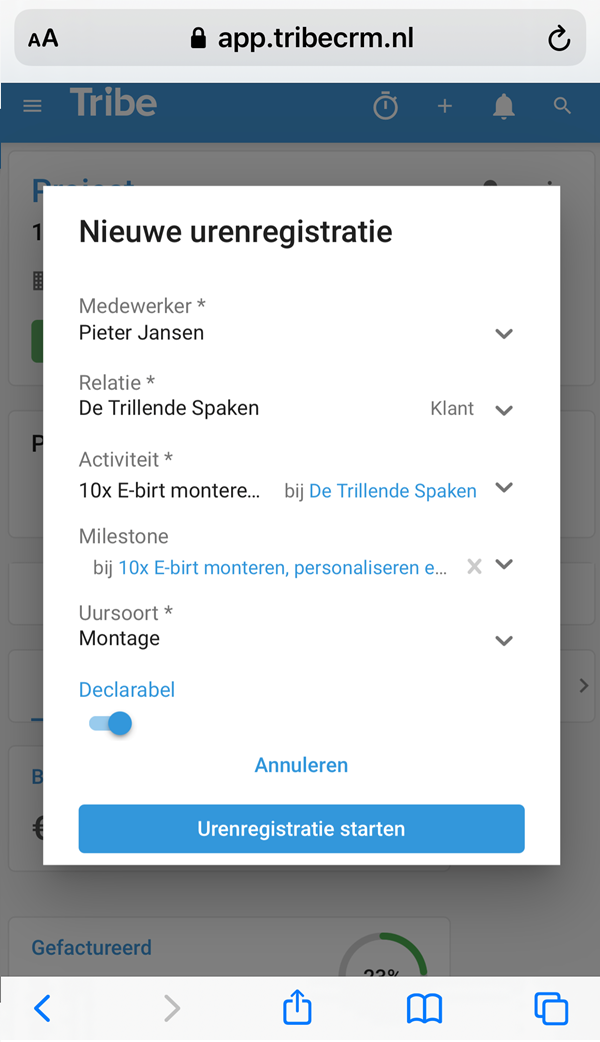
Start time tracking on your smartphone in Tribe CRM
2 How can I record hours after my work is done ?
Besides being able to track hours with the timer which is especially handy if you work on many different projects in a day, you can also enter your hours afterwards.
- To do so, open the entity to which you want to link hours and click on the Hours tab.
- Click on Hours to be processed and then click +Hour registration.
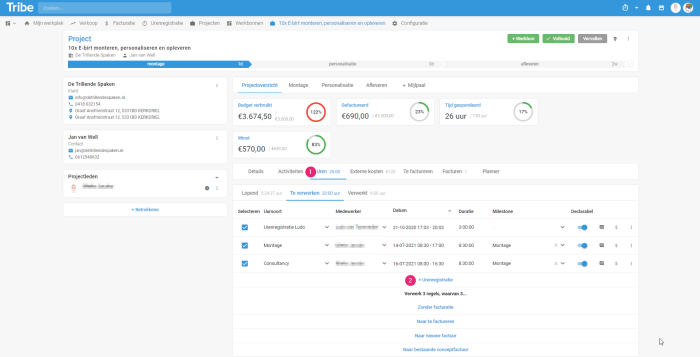
Registering hours from a project in Tribe CRM
- Enter Hour type by choosing from the predefined hour types, or enter a new hour type
- Enter the Employee. By default, the logged-in employee is selected, but you can also select another employee.
- Enter the Date and from to time. By clicking on the field, you can use the calendar to choose a date, enter a start time and set the duration. More information about the date/time field and the scheduler is given in the next section.
- If you add a time registration for a project, you can also enter the Milestone. This is a phase within a project which is determined per project.
- Slide Declarable to the right if the entered timesheet is to be invoiced.
A time recording rule in Tribe CRM
Period and planning within date fields
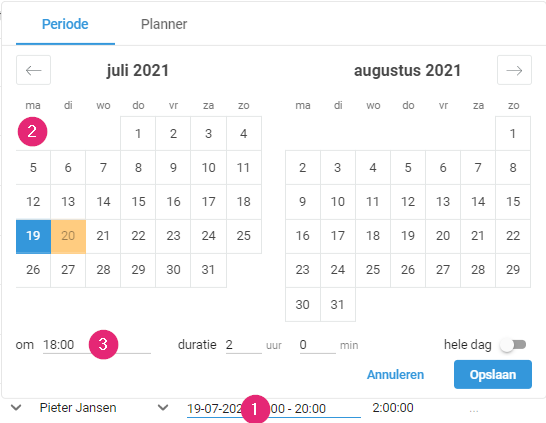
Calendar (Period tab)
- Click on a date field to display the calendar.
- Click on a date to adjust the date.
- The start time is chosen automatically. Click on it to adjust it.
Update date in Tribe CRM
- Under time, you can select hours on the left and minutes on the right. You can scroll up and down to display more. It is also possible to enter the time itself (format HH:MM). Enter the duration.
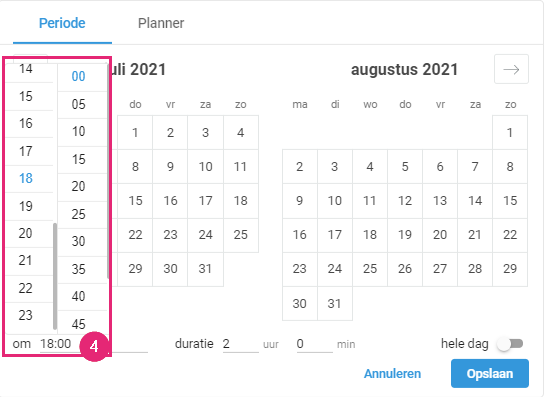
Adjusting time in Tribe CRM
- In the planner tab, you can see the availability of you and your colleagues. If you make a selection here (drag and drop), it will automatically be entered in your time registration with your correct employee.
- Choose a different view if necessary.
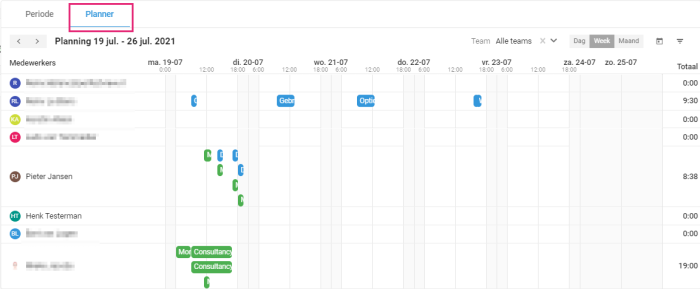
Planner in Tribe CRM
3 How can I register hours via tasks and appointments?
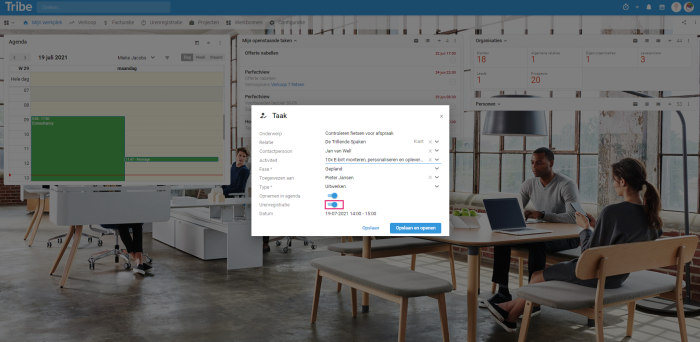
It is possible to register hours directly to a task or an appointment. When entering a task, you can specify a date, time and duration and these can be automatically registered to the selected activity.
Registering hours directly with a task or appointment
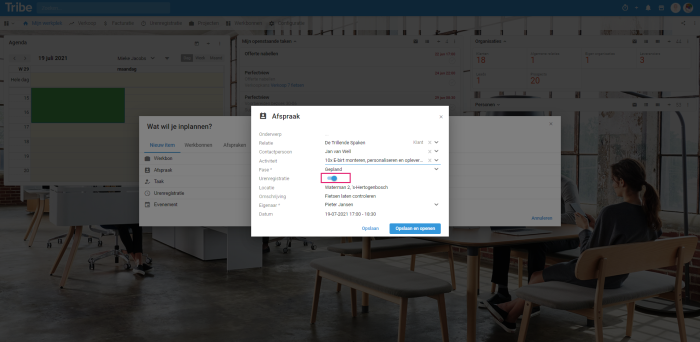
When scheduling your tasks or appointments, you can directly indicate whether the task or appointment should be logged in the time registration of an existing activity. To do this, slide Time registration to the right.
Registering hours to an appointment in Tribe CRM
Registering hours to a task in Tribe CRM
4 How do I add hour types?
Hour types can easily be added in configuration or while adding hours. Hour types are linked to products.
Add products for hour types
- Go to Configuration.
- Click
- All product groups are displayed on the left. Click on +Product group if you want to add a product group.
- Click +Product.

Adding products in the configuration in Tribe CRM
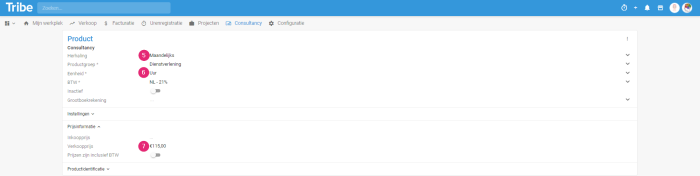
- Repetition can be filled in, but this is not mandatory. This can be used for subscriptions.
- Enter the data. The unit should be Hour.
- Under Price Information, the Selling Price can be entered.
Adding products in the configuration in Tribe CRM
Adding hour types
- Go to Configuration.
- Click on Time recording.
- All hour types are displayed on the left. Click on +Hour type.
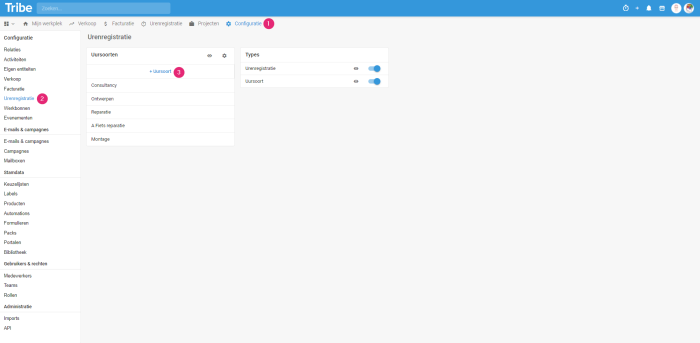
Adding hour type to configuration in Tribe CRM
- Enter a name and a product and click Save.
Add an hour type from the timesheet
- In the hour type dropdown, click +Hour type
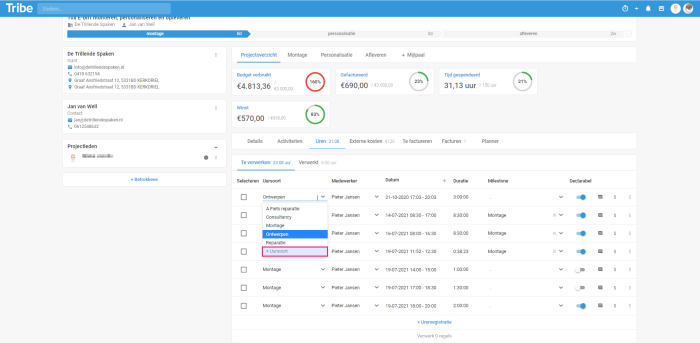
Add an hour type from the timesheet in Tribe CRM
5 How can I process hours?
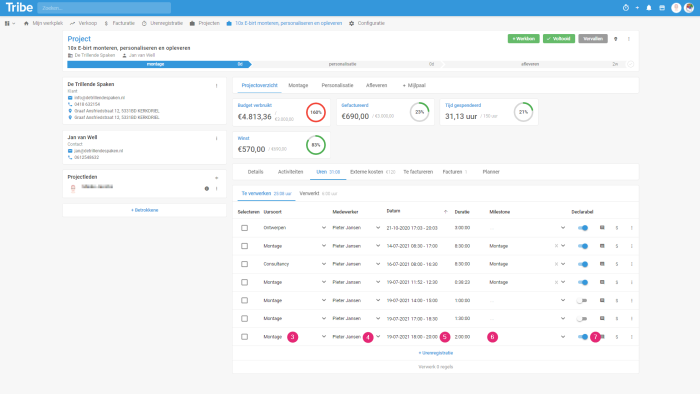
After hours have been recorded, they still need to be processed. Even hours that are not declared should first be checked by the person responsible for the entity, e.g. the project manager.
To process hours, open the entity to which you want to link hours and click the Hours tab.
Here, the Running hours are displayed (in case a time registration has been started via the timer), Hours to be processed and Processed hours. For Hours to be processed, the following choices can be made:
- +Hour registration: Enter here the hours made can be entered afterwards.
- Without invoicing: Process hours that are not billable. This moves them to the Processed tab.
- To invoice: This is a temporary repository of hour records Put here the hours that you want to invoice, but don’t want to put on the invoice yet. At a later stage, you can invoice the hours at once.
- To new invoice: Instantly create a new invoice from the selected lines.
- To existing concept invoice: Choose this option if there is already a concept invoice ready to which these hours should be added.
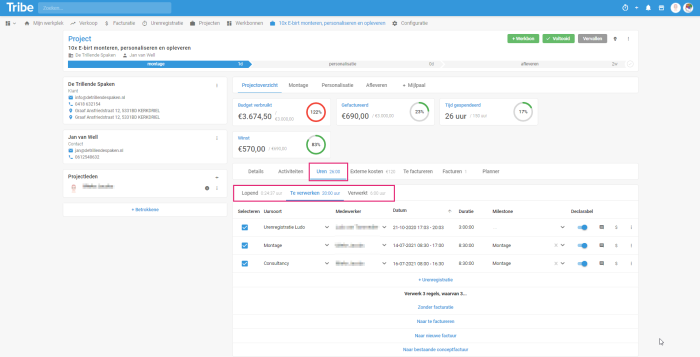
Processing hours in Tribe CRM
Did you know?
You can learn more about how to invoice with the article How do I create and send an invoice?