Tribe CRM allows you to import different data, such as relationships, activities or products. In this article, we will assume a relationship import and describe some important features you need to know before importing.
- What should my import sheet look like?
- I have one sheet with organisations and contacts, is that possible?
- I have separate sheets with organisations and contacts, is that possible?
- Executing and reversing an import.
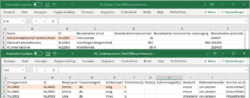
- Sample file
1. What should my import sheet look like?
You probably want to import your data and get started with Tribe CRM as soon as possible. To avoid ending up missing data or having data in the wrong place, we advise you to check your import file first. Is the data in the right column? Have you exported all necessary data from your old application?
To import into Tribe CRM, you will need an Excel or CSV file. At the bottom of this article you will find several sample files that you can download to use as the basis for your import.
This sample file contains all the fields that are in Tribe CRM by default, item by item. By using this sample file while importing, the columns from the Excel are automatically linked to the correct fields in Tribe CRM as much as possible. So this makes importing easier for you.
2. I have one sheet with organisations and contacts, is that possible?
Yes, you can. Your import then starts at contact level. To do so, navigate to:
- Configuration
- Relationships > Person types > Contacts.
- When opening the contacts section, click the import button.
- Upload your file. After uploading your file, your screen will be divided into three columns.
Column left: Here you will find all the columns from your import file by record. You can use the arrow keys to navigate through the different records. If the name of a column in Excel matches the name of a field in Tribe, they are automatically linked together. You can see this by the green tick in the line.
Column middle: This column shows the contact’s fields. The order of the fields is exactly the same as when you manually add a contact in Tribe CRM. When a column is automatically linked to a field, you can see this because the name of the column and example information is shown in the field.
Column on the right: This column shows the fields of the organisation, just like the contact. As Tribe CRM has different types of organisations by default, when importing organisations you have to specify which type of organisation you want to import. You do this in the type field. If your import file contains a column where the organisation type is defined, select this column. If this is not the case, select the default value for this import in the list box, for example Customer. All the organisations in your file will then be imported as customers.
- Link all columns to the appropriate fields in Tribe CRM, by clicking the arrow behind each field and selecting the appropriate value.
- In the left-hand column, check that you have linked all fields. Is there a green tick in the line everywhere?
- Click the Start import button.
During import, a duplicate check will be performed by default. Read more about the duplicate check.
Did you know?
You can link columns multiple times to different fields? For example, if you only have all the address fields in the file once, you can link them to both the visitor address and postal address fields.
3. I have separate sheets with organisations and contacts, is that possible?
Yes, you can. Your import will then start by importing all organisations, followed by the contacts. As these are separate import sheets, it is important to decide how to link the contacts to the correct organisation before the import.
For example, Emma de Jong works at Schoonmaakbedrijf Helderschoon BV. Emma’s details are in the contacts sheet and Bright clean details in the organisation sheet. During import, how do we link these relationships in Tribe CRM? Theoretically, it is possible to do this based on the name of the organisation, but we recommend doing it based on a unique ID. The ID of the organisation will be in the organisation sheet as well as in the contact sheet. For example, cleaning company Bright clean has ID NL12001. This ID is also registered with Emma de Jong. By using the organisation ID, the correct link is made between the relations. Emma also has a personal ID, which can be used to link any activities during an import. Check beforehand whether your file contains such an ID.
When importing the organisations, make sure the ID is added in the background.
One organisation sheet with different types of organisations
Do you have one organisation sheet with different types of organisations, such as customer, supplier or business partner? Then navigate to:
- Configuration > Relationships > Click the icon behind organisation types.
- Click the Import button.
- Upload your file and, in the type field, select the appropriate column for all organisation types.
- Add the ID to the import by clicking the dot menu and then The advanced settings open at the bottom of the screen.
- Open the ‘Duplicate detection of organisation (relationship)’ section.
- Activate the ‘Add an ID to the new organisation for use in subsequent imports’ slider.
- Select the column containing the ID.
- Repeat these steps for the ‘Duplicate organisation detection’ section.
- Perform all other steps as described above.
Multiple organisation sheets, by type of organisation
Do you have multiple organisation sheets for each relationship type? So one sheet for customers and another for suppliers. Then perform the steps for each relationship type.
- Configuration > Relationships > Customers.
- Click the Import button.
- Upload your file.
- Add the ID to the import by clicking the dot menu and then The advanced settings open at the bottom of the screen.
- Open the ‘Duplicate detection of organisation (relationship)‘ section.
- Activate the ‘Add an ID to the new organisation for use in subsequent imports’
- Select the column containing the ID.
- Repeat these steps for the ‘Duplicate organisation detection’
- Perform all other steps as described above.
Contacts sheet
- Configuration > Relationships > Contacts.
- Click the Import button.
- Upload your file.
- Find the organisation ID by clicking on the dot menu and then The advanced settings open at the bottom of the screen.
- Add the person’s ID by clicking on the section’ Duplicate detection of contact (relationship)’.
- Activate the ‘Add an ID to the new contact for use in subsequent imports’
- Select the column containing the ID.
- Now open the Advanced menu in the organisation column.
- Open the ‘Duplicate detection of organisation (relationship)‘ section.
- Search for the organisation’s ID by activating the ‘Search for entity with an ID from a previous import‘ slider.
- In the ‘Key from previous import’ field, select the file name with “-relationship” (e.g. customer).
- In the ‘Source field to be used as ID’ field, select the column containing the organisation’s ID.
- Then click on ‘Duplicate detection of organisation‘
- Activate the ‘Search for entity with ID from a previous import’
- In the ‘Key from previous import’ field, select the file name with “-organisation”
- In the ‘Source field to be used as ID’ field, select the column containing the organisation’s ID.
- Perform all other steps as described above
4. Executing and reversing an import.
After starting the import, you can monitor the progress on the import dashboard. Here you can see exactly whether new data has been created or existing data has been updated. You can also see the number of errors that may have occurred. Clicking on the number shows a list of line numbers, which correspond to the line numbers in the upload example. In the upload example, you can quickly navigate to a specific line number by clicking on the dot menu > ‘go to line number’.
In addition to the summary, all imported records are shown on the corresponding tabs. Here a distinction is made between organisations and persons and the various relationship types you have imported. You can find more information about relationships and relationship types in the article “The structure of Tribe CRM”.
Reversing imports
Should your import contain too many errors or you have not linked all fields correctly. Then it is possible to reverse the import. You do this by clicking the red ‘Undo import’ button. This will remove all data from this specific import. When everything has been reversed, you can make the necessary adjustments and perform the import again.
What else should I know about importing?
In this article, we have gone through the basic steps about importing with you. However, there are some additional features that we think are important to share with you. So check out the articles below for more information.
5. Sample files
In this article, we share some sample files with you. You can use these as a basis for your own import sheets. The documents contain everything by default columns per item in the application. If you have created additional fields yourself, add them to the sheet.