Introduction
Widgets help you enormously in your daily work. Different types of widgets clearly display the information that is important to you. This allows you to take immediate action on things that are important to your organisation. You have already read about the widgets in Tribe CRM in the article ‘What are widgets? By now you know that there is a standard widget library. As an administrator of Tribe CRM, you can create your own widgets. Your employees will then find these widgets in the widget library.
- How to create a new widget?
- What types of widgets are there?
- Some practical examples
1 How to create a new widget?
What kind of widget do you want to create? Your starting point for creating a widget depends on the information you want to see. If you want a sales forecast widget, you start with the sales opportunity. If you want a widget that contains product information, you start with the products. On every component in Tribe CRM, you can add widgets and widgets are available that you can reuse.
When you want to create a widget, follow these steps:
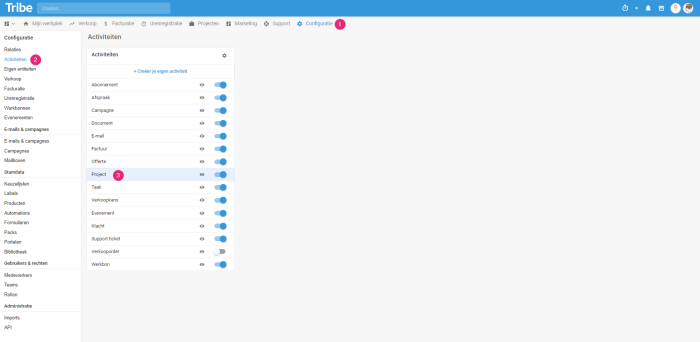
- Navigate to the component on which you want to add the widget by going to configuration.
- Click on
- Click on the relevant activity (project, sales opportunity, invoice, etc. ).

Creating a widget in Tribe CRM - On the widgets tab, you will find all available widgets.
- Select the widget you want to use as a base or click +new widget to create a totally new widget. [

- Give your widget a clear name. Once you have selected an existing widget, click save as new widget at the bottom right of the screen (an exact copy will be saved with the same name).

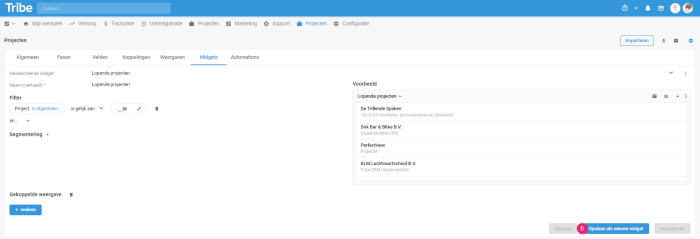
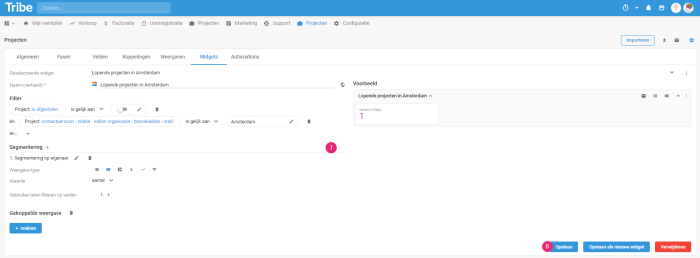
- You now have two options to compose and/or customise the widget: Filter and Segmentation: Filter: Whether you need a filter depends on the data you want to show in the widget. For example, if you want an overview of all current projects, you need a filter. The filter ensures that closed projects are not shown in the widget. In this case, you filter by the phase of a project. In our example, we have created a widget of all ongoing projects whose city of the visiting address is Amsterdam. Segmentation: The segment ensures that the information in your widget is displayed based on the field that is important to you. Another example of all current projects. Without segmentation, you get to see a long list of all current projects. By adding a segment based on the owner field, the long list of projects is now divided into projects per employee.

Filtering and segmenting in widget in Tribe CRM - Save the widget and add it to your dashboard.
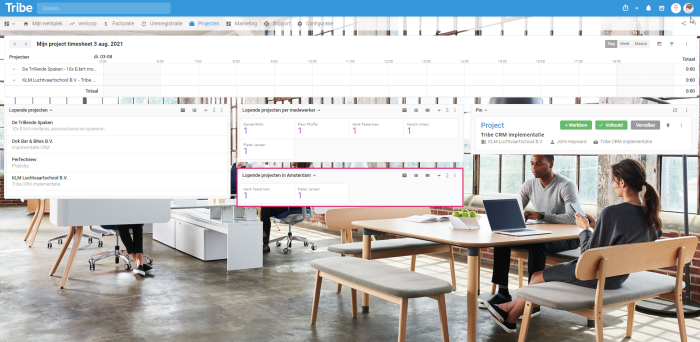
Adding your own widget to the Dashboard in Tribe CRM

2 What types of widgets are there?
Depending on the type of information you want to display in your widget, you can choose from a number of different types of widgets. The types of widgets concern the way your data is displayed visually. After all, information such as your sales pipeline becomes a lot clearer if you display it in a so-called funnel widget than if you display it in a list.
You can see the different types of widgets in segmentation.
- List: the data is displayed below each other in a list.
- Tiles: tiles show the numbers of the segmented field. Such as the numbers of ongoing projects per employee.
- Pie chart: displays a distribution of data. Pie pieces are distributed based on the segmented field.
- Bar chart: on the x-axis, the segmented field is added. On the y-axis the numbers.
- Graph: on the x-axis, the segmented field is added. On the y-axis the numbers.
- Funnel: the data are displayed in a funnel. Through the funnel, it is clearly visible what stage the sales opportunities are in and the potential turnover involved.
All types of widgets give you one more feature, namely column view or a bucket view. A column view is built based on the segment you have added. You can find an example of the bucket view in the aforementioned article ‘What are widgets’.
3 Some practical examples
Now it’s time to ‘build’ your own widget. To get you started, we’ll give you some real-life examples. You can recreate these or modify them yourself. When getting started with widgets, it is also useful to first read the article ‘building Tribe CRM‘. Here you will find more background information on the structure of Tribe and the field selection screen.
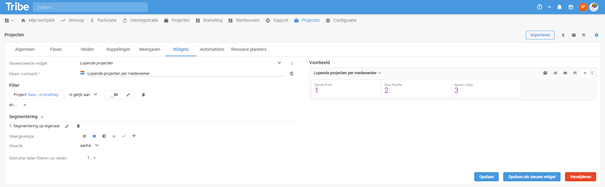
Current projects per employee
For this widget, start on the widget tab in the projects section (accessed via configuration).
- When you use the default current projects widget as a base, you have the right filtering right away.
- When segmenting, click the + button and navigate to the owner field in the left column.
- Now select the tile widget for a clear overview.
- Use the save as new widget Then customise the name and save.
Example of adding a widget in Tribe CRM
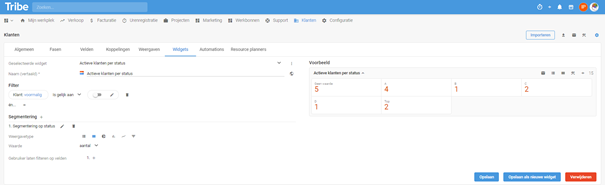
Active customers by status
For this widget, start on the widget tab in the customers section (via configuration).
- Choose the + New widget option.
- Click the + button in the filter and select the field former, then the value is equal to and slider remains grey (not active). This way, you get only the active customers and the inactive ones are filtered out of your widget.
- When segmenting, click the + button and navigate to the status field in the left-hand column.
- Now select the tile widget for a clear overview.
- Customise and save the name.
Example of adding a widget in Tribe CRM