Single Sign On (SSO) allows users to log in once after which they can automatically access multiple applications across a network. Follow the steps in this article to add SSO settings to Azure AD for Tribe CRM.
Azure AD settings
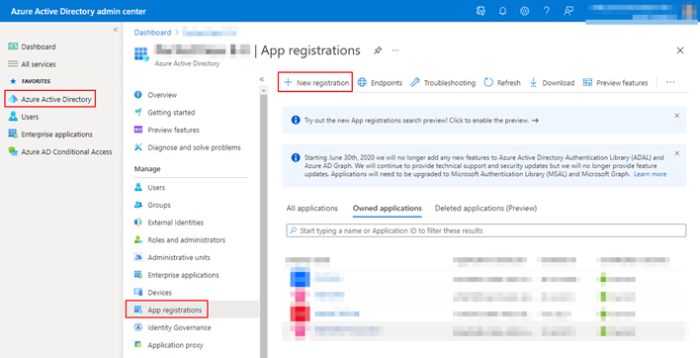
- Go to the Azure Active Directory admin centre.
- Click App registrations and then + New registration.
Tribe CRM – Azure AD
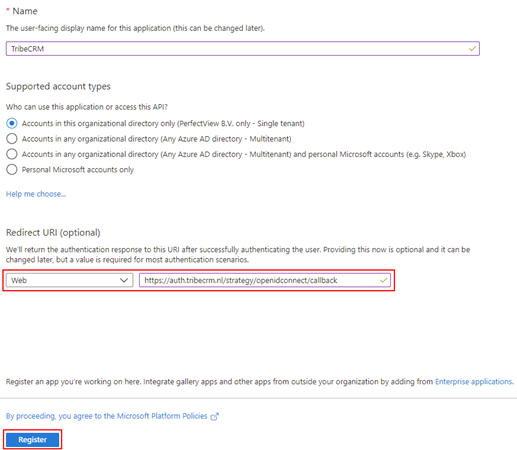
- Then fill in everything as shown in the screenshot below and click Register. Name is of course freely fillable. ( The redirect URI is : https://auth.tribecrm.nl/strategy/openidconnect/callback )
Tribe CRM – Azure AD Register
- After registering, the screen below appears. Now copy the Application (client) ID and save it in a txt file. This file should be passed to Tribe CRM so that we can create the correct configuration.
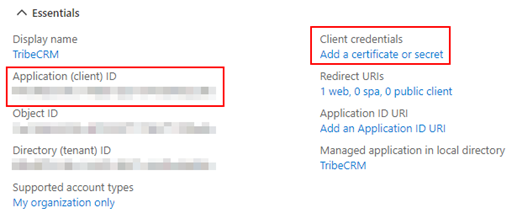
- In addition to the Application (client) ID, we also need a so-called client secret. You can create this by clicking on Add a certificate or secret (see screenshot in previous step) and then on + New client secret.
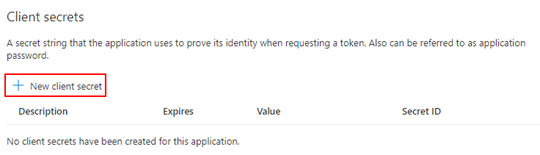
Then name the secret, choose the desired shelf life and click Add.
Note!
Send a new client secret to Tribe CRM when the old one has expired. Therefore, it can be useful to set a custom period.
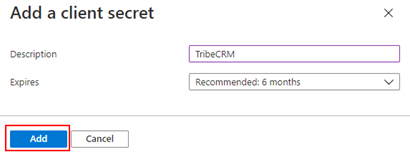
Now copy the value written under Value and place it in the txt file created earlier.

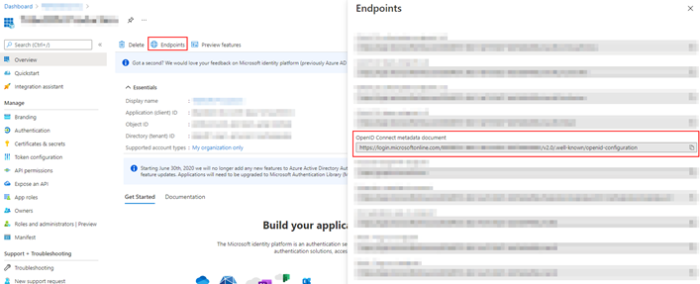
- To create the correct configuration, all we need is the so-called Open ID Connect metadata document URL. This URL can be retrieved via the Endpoints button in the overview screen of the App registration we just created.
- If all goes well, you have now collected the values below :Application (client) ID
Client secret
Open ID Connect metadata document URLPass these to us so we can create the correct configuration.